One of the most popular questions you may find yourself pondering is how to remove popcorn textured ceiling because you have one in your home has gone out of style. The task involved in finding out how to remove a popcorn ceiling texture is very messy but may worth the effort provided the underneath is in perfect condition.
Because popcorn ceilings were no longer in style many years ago, most new homeowners need methods to remove the popcorn ceilings. Removing the popcorn texture is an easy task, but it can turn challenging if not done correctly.
This post will discuss some of the easy fixes on how to handle this, most easily and perfectly without causing a mess. You will learn some helpful tips to consider to remove the popcorn ceiling from the wall in this article. First and foremost, let’s look at what popcorn ceilings are.
What Are The Popcorn Ceilings?
Popcorn ceilings are a style that trend around the 1960s and are mainly texture added to plaster and drywall ceilings, which were seen as a perfect way to combine visual and textural interest overhead. It was also a great method to conceal imperfections, and it doesn’t need any additional painting once applied.
But as time goes by, it was discovered that keeping popcorn ceilings clean and dust-free is a very difficult task; hence, there is a need to remove them.
How To Remove Popcorn Ceiling?
Learning how to remove a popcorn ceiling yourself is another option you have. Fortunately, this do-it-yourself approach is simple, technically, and it only requires a few tools with no special knowledge. However, it involves hard work. Scraping a covered popcorn ceiling can take longer than you budgeted for.
Below are the tools required to make the popcorn ceiling removal job easier and faster:
- Clothes that can be destroyed: Lipford says, “do not put on clothes you are planning to wear to an occasion”. It would be nice if you can get a disposable crawl suit that has a hood that you can just remove after scraping, and it goes for $7.60. You can also wear protection for your eye and a hat on your head to prevent yourself from being hit with glop falling from the ceiling.
- Facial mask and goggles. Make sure you invest in a good respirator masks and protective safety goggles. You can get a decent set for $20-30.
- A sprayer: A garden sprayer that goes for $9.97 in the store and some fabric softener.
- A scraper: You can use any six to ten-inch drywall knife as a scrapper, but to simplify things, Lipford recommends a tool specially made by Homax for popcorn scraping which is being sold for $21.99, and it has a loop joined to a trash bag which enables you to scrape directly into the bag instead of onto your precious floor.
- Drywall joint compound with a putty knife: The compound which is also referred to as “mud” is available for $5.48 on online store. Your scrapper can also double as a putty knife.
- A sander: The drywall pole sander is the easiest and is available for $19.98. It contains a pivot and a pole that enable you to sand the whole ceiling right from the floor where you stand.
- Paint and roller: Experts say many ceilings are painted with flat-white latex. Grab the one adequate for two coats. You should consider buying the exact kind of ceiling paint, including primer. Painting the walls and the ceiling the same color is the best approach to avoid cutting in the edges of the top wall.
- Light and dam: This is optional, but having some additional light focused on the ceiling to see clearly what you are doing and a fan to help dry up things while you work, may be helpful. a
Key Tips To Remove Popcorn Ceiling From The Walls
Below are some tips to reduce the stress of removing the popcorn ceiling:
1. Conduct a scrape test
Try to scrape a small part while you are considering popcorn ceiling removal before you launch into room preparation. First, try it when it is dry, then dampen the ceiling texture with water and retry. Although some texture is removable without water, mostly, it is best removed when wet.
Note that if the water doesn’t soak in and the texture is not softened, then paint might be included in the texture mix, or the ceiling itself has been painted. In a situation like that, wetting may not work on the ceiling, and you may have to choose whether to proceed with a difficult scraping or just find another way to conceal your popcorn ceiling.
2. Check for asbestos
If you have a popcorn ceiling applied before 1977, then your ceiling must have been mixed with a little quantity of asbestos together with the chalk and wallboard compound used to build this material. Some builders may have proceeded with the usage of asbestos in their list of supplies even after the asbestos laws were passed.
Danny Lipford advised that you should get a home kit and test your ceiling for asbestos before you do anything. Even if you discovered that asbestos is contained in your popcorn ceiling, there is still a chance you can perform the removal yourself.
Make sure you check your local laws concerning the removal and disposal of asbestos. You just need to be very cautious of the dust and put on a disposable cloth like the crawl suit, goggles, and respirator.
3. Get your room ready for a very big mess
You might start to feel like heaven is coming down with all the sanding and scrapping that is about to start. Keep your highly prized belongings safe by removing all furniture items and covering very large belongings in plastic sheets. Also, use plastic drop cloths to cover walls and floors and secure them using heavy-duty painters tape.
Before work commences, make sure you remove ceiling fans and fixtures and cover exposed electrical outlets and light fixtures using painter’s tape. Make sure those electrical elements are not connected to power before you start working. Also, make sure all your materials are available and present with you, such as a garden sprayer, gloves, a tall ladder, a face mask, pro hand scrappers, and protective eyewear.
4. Remove the furniture
Move out all the furniture items in the room you will be working in. You need to make sure there are no obstacles as you move the ladder around when learning how to remove popcorn ceiling. If you can’t remove every item from the room, cluster, and cover the items using drop cloths.
5. Take out ceiling fixtures and fans
Even though you may think it is simple to leave electrical fixtures hanging on the ceiling as you try to find a way to remove the popcorn ceiling; you will be surprised at how much disturbance they can cause and also get them covered with wet popcorn. Also, you want to avoid an accident of spilling water into an electrical outlet.
6. Be careful not to spray can light with water
Stuff rosin paper of newspaper in your recessed can to make sure they remain dry as you complete your popcorn ceiling removal task. Additionally, make sure you turn off the power to your electrical features at the fuse box or circuit breaker panel.
7. Use a pump sprayer to wet
To make scrapping easier and have a dust-free room when removing the popcorn ceiling, make use of a pump sprayer to wet the ceiling and allow it to soak for about fifteen minutes before you start scraping. Make sure the misting is light so as to avoid damaging the drywall or loosening the joint tape.
If, after the first fifteen minutes, the texture is still hard, re-spray it and leave it for another fifteen minutes. If the texture hasn’t softened this time around, then it might be painted, or paint was added to its mixture before it was applied.
In any of these cases, water penetration may not be easier. For a painted texture, dry-scraping might be possible to lift the painted layer and expose some parts of the unpainted texture, which you can then apply wet scraping on. Dry-scraping might be the only solution to a texture mixed with painting or just covering it up using drywall or T&G boards.
8. Cover electrical boxes
Cut off the power to any junction boxes located in the ceiling and cover them using painter’s tape to make sure the wiring maintains nits dryness even when you spray water on the texture, as you find out how to remove popcorn ceiling.
Ensure overlapping by the sides of the junction boxes using the tape, and then use a utility knife to trim the perimeter, and be cautious so you don’t nick the wires during this process.
9. Work in small parts
Simplify your work by spraying and scraping a small section at a time, consider 4 x 4 ft. The popcorn might get dry before you can scrape it off if your work is being done on a large section at a time. If this occurs, spray the section again and wait for another fifteen minutes before you scrape.
10. Remove the mess using a mud pan
Collect the wet popcorn before it reaches the floor using a mud pan, just like the type for keeping a joint compound. This will help you against tracking it all over the place you are working, especially when moving the ladder around.
Additionally, clean off your scraper using the edge of the mud pan once it gets loaded up with wet texture. You can get a mud pan at home centers.
11. Prevent gouging
Prevent gouging your ceiling with your scrapper by rounding its edges off whether you are using a drywall taping knife or a putty knife. This will prevent you from sustaining many ceiling wounds to repair. This can be done using a sander, a file, or an electric grinder.
12. Scrape
Ordinary scrapping won’t get your ceiling ready for painting. There will definitely be some gouges and dings to repairing. Sanding will at least be required by the ceiling before you can get it perfectly ready for painting.
13. Leave the ceiling to dry
You need to give the misted drywall and room a great amount of time to dry. A gypsum core and a paper backing are present in drywall, which both holds water for a significant amount of time.
The drying process can be increased with the help of air ventilation and temperature. Leave the room to dry for about 24 hours after getting the ceiling texture out.
14. Fix ceiling damage
Ceiling scraping will definitely leave scratches, shallow holes, and gouges on your ceiling. Apply dust-control drywall compound to the affected areas using your cleaned scraping tools. Use quality sandpaper to sand-smooth the areas. Wipe the areas clean, and your ceiling is fully prepared for priming and painting.
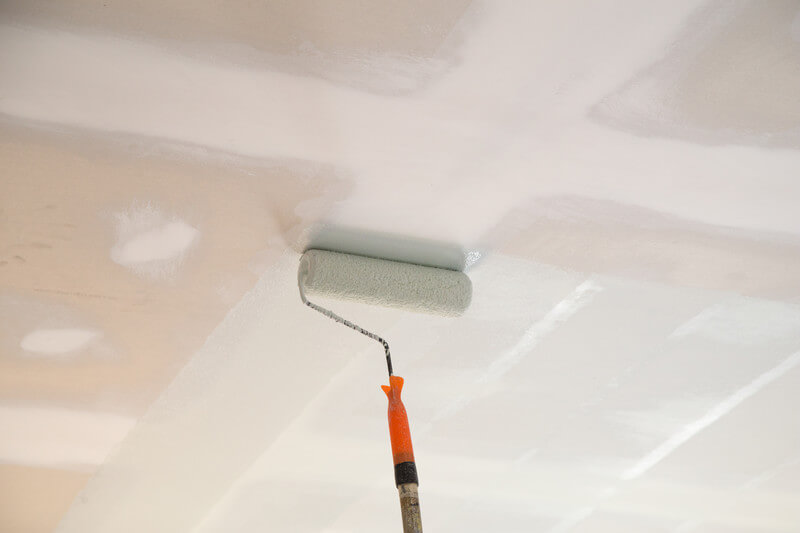
15. Time to paint!
Complete your ceiling with 2-coats of paint, trim the edges using a brush, and fill it using the roller. You are welcome to a world where popcorn ceiling no longer exists, as you now know how to remove a popcorn ceiling.
FAQ About Popcorn Ceiling From Walls
What is the cost of popcorn ceilings removal?
The cost of popcorn ceilings removal is determined by the country’s part, including assumptions, complexity, and scope of work. In general, the price is at $2 to $3 per square foot provided you don’t have an additional coat of paint on the ceiling, or lead paint, or asbestos.
Also, there is post-removal work such as smoothing or prepping the walls, priming, as well as painting that needs to be done. Note that your cost will be significantly higher when you have a lead and/or asbestos, and you require abatement. The price might be double or four times the amount.
Is sanding of textured walls possible?
Make sure your floor is covered with something to avoid getting it ruined and dirty. Then gather the necessary tools needed for the task. You will need a scraper, protective goggles, a water-filled spray bottle, a joint compound, and a wallboard knife. Then smooth out any gouged, dinged, or uneven areas using sandpaper.
Are popcorn walls truly dangerous?
Popcorn ceiling becomes dangerous with any percentage of asbestos in it. The popcorn ceiling can easily get damaged, as it is a friable material. Toxic dust is released by friable asbestos materials, even when disturbed a little.
One can start developing serious health issues such as mesothelioma, asbestosis, and lung cancer when asbestos dust is inhaled.
What popcorn ceiling removal method is the easiest?
Mist the ceiling using a garden pump sprayer to have the easiest scrapping with no dust when removing the popcorn ceiling and leave it to soak for about 15-mins before you escape. Make sure the misting is only light so that you don’t damage the drywall or loosen the tape with excess water.
What tools can one use for popcorn ceiling removal?
Use a scraper: from six to ten-inch drywall knife is perfect as a scraper. Still, you can easily buy the special popcorn scraper tool from Homax as suggested by Lipford for $21.99 as it comes with a loop to hook a garbage bag for direct scraping into the bag and not onto the floor.
Can popcorn ceiling removal be DIY?
Know that the ceiling that doesn’t allow water to soak in has been painted, else, the texture should easily remove. Suppose there is more than 1% of asbestos content on the material.
In that case, removing it yourself is prohibited by law, and you will need to bring a professional asbestos removal contractor or just leave the ceiling as it is.
What method do you use to remove a popcorn ceiling without scraping it?
The drywall completely covers the popcorn texture, which gives your ceiling a smooth finish you can start with. Make sure you hold the drywall to the framing. It may be difficult to lift the drywall on your head, but you can just rent a drywall lift to reduce the job’s stress.
Can I paint on my popcorn ceiling instead?
Yes.Here is how you can paint on your popcorn ceiling – 1 coat can make anything look fresh, including popcorn ceilings.
Popcorn ceilings are also referred to as textured ceilings, cottage cheese ceilings, stucco ceilings and were commonly used as an alternative to troweled plaster around the mid-20th century.
There will be a lot of demand and not much supply for a house worth $200,000, which has a popcorn ceiling. The houses quickly sell in the market, so there is not much to do, according to Schutte.
He also estimates that popcorn ceiling removal would add $25,000 – $35,000 in value for a big estate executive home.
Conclusion
Popcorn ceilings removal involves wetting and a lot of mess. The ceiling style was highly used in the ’50s, and 60’s due to its pocket-friendly nature. However, popcorn ceilings quickly went out of style because of their concerns about health. This article has discussed everything you need to know about removing popcorn ceilings in your home. We hope that you will have no challenges when removing it yourself.
In order to be certain, there is no asbestos content in your popcorn ceilings; we advise you to consult a health department in your local area before you swing into action. Homes that are built after the ’90s are safe. However, if your home was built before the 90’s then sure to do everything necessary before you start scraping to avoid developing lungs issue in the future.
However, if you find this project a bit difficult or risky for you, we are just a phone call away and will be glad to help you remove your popcorn ceiling seamlessly.